Mounting for QuickTalker Freestyle Mini


Introduction
This article offers an introduction and overview of how to get started with mounting your QuickTalker Freestyle Mini.
First you’ll need to identify which mounting solution is compatible with your QuickTalker Freestyle Mini. For more information on how to identify which model you have, please visit our guide here.
Getting Started
The videos below offer an introduction and overview of how to set up your QuickTalker Freestyle Mini with the correct mount for your device. They will guide you through initial setup, including attaching the mounting plate or tablet holder to your device and using the One Mounting Arm.
Mounting With AMPS Mount For One
For QuickTalker Freestyle Mini speech device users that have the two QR codes printed on your kickstand, the One Mount with the AMPS Mount for One offers versatile, quick-ready mounting for various settings, including wheelchairs, tabletops, and beds.
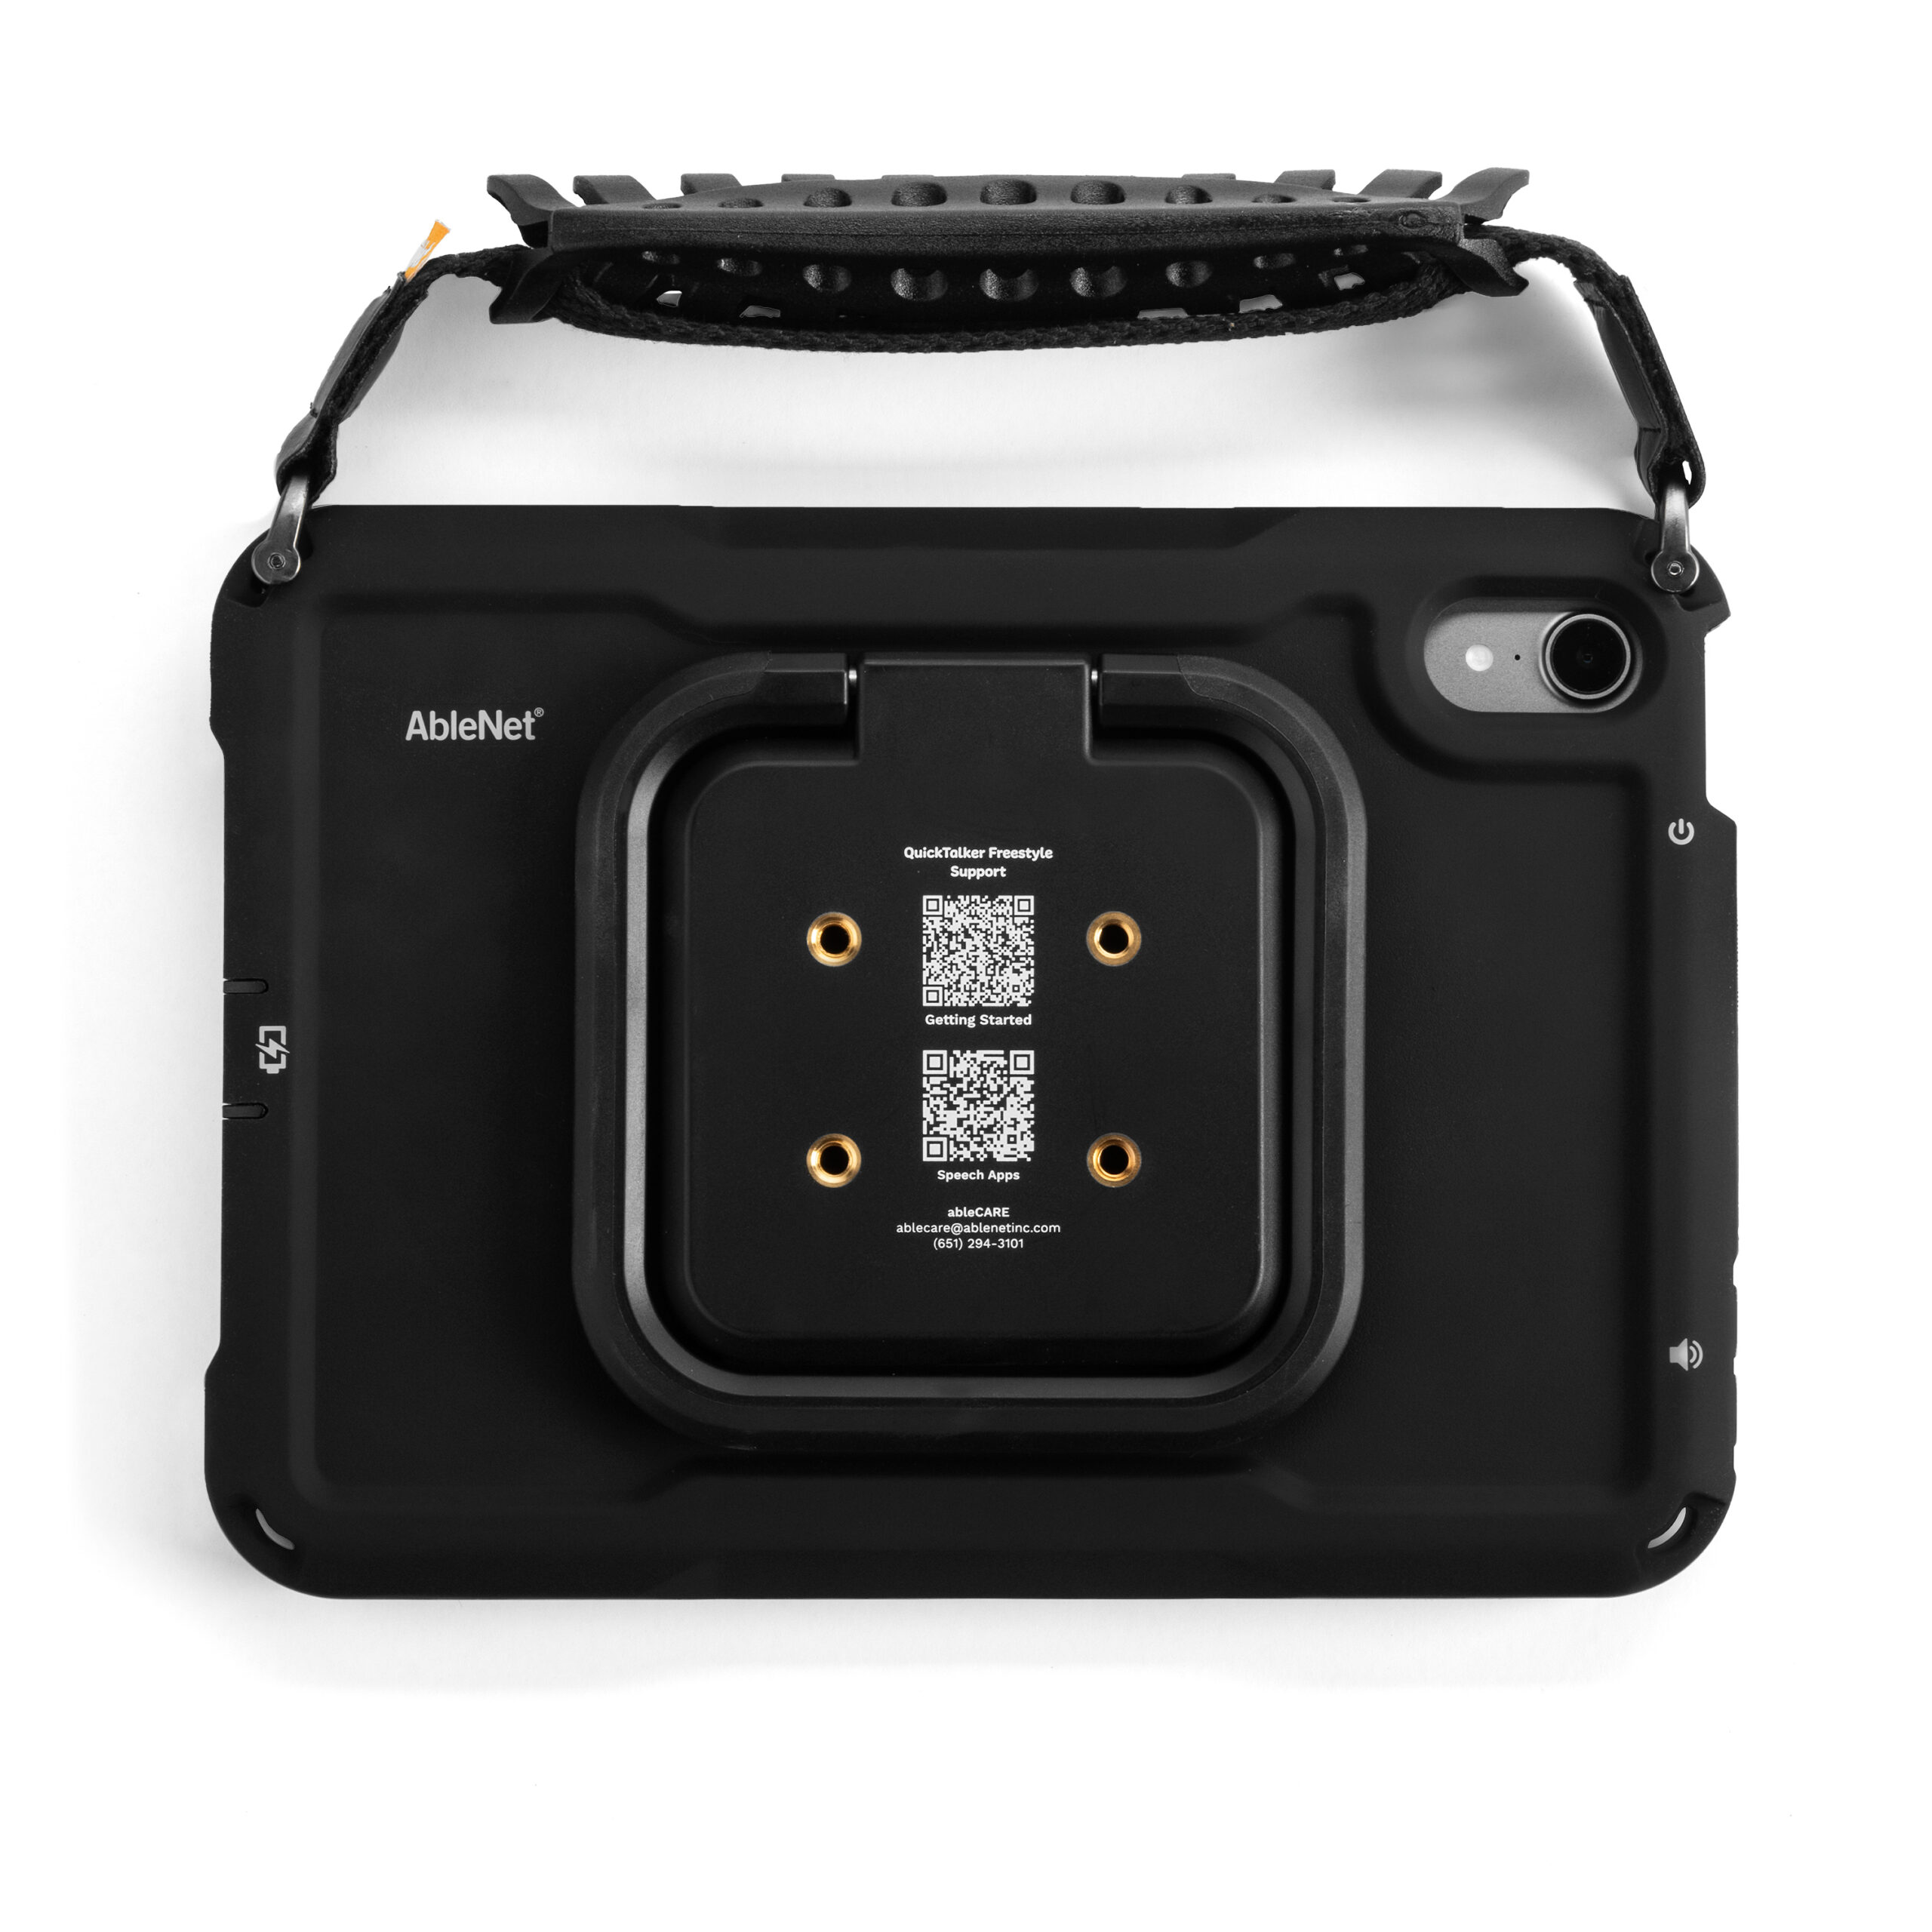
To use your AMPS Mount for One, follow these steps:
- Place the mounting plate on the back of the kickstand, aligning it with the four threaded holes.
- Insert and tighten the four included screws.
- Secure the One mounting arm to a tabletop, wheelchair, or other desired surface.
- Loosen the thumb screw on the mounting plate so it no longer extends into the center hole.
- Slide the mounting plate bracket onto the One mounting arm.
- Tighten the thumb screw to secure the device in place.
Mounting With The Quick Ready Tablet Holder
For QuickTalker Freestyle Mini speech device users that have the round silver circle on your kickstand, the One Mount with Quick Ready Tablet Holder offers versatile, quick-ready mounting for various settings, including wheelchairs, tabletops, and beds.
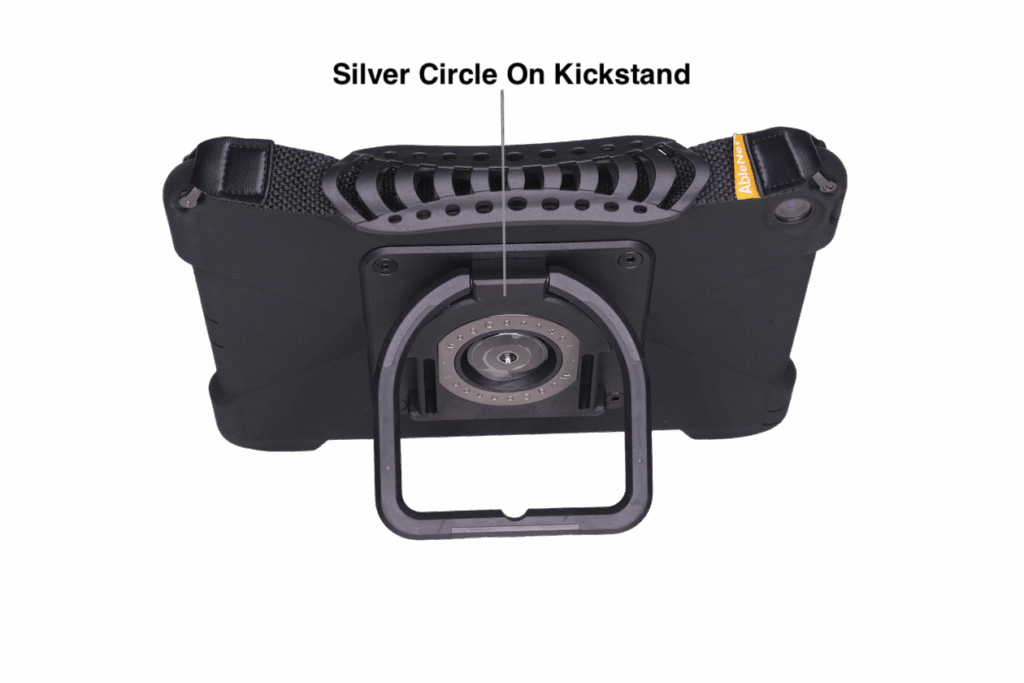
To use your Quick Ready Tablet Holder, follow these steps:
- Secure the One mounting arm to a tabletop, wheelchair, or other desired surface.
- Attach the threaded bolt on the tablet cradle to the end of the mounting arm.
- Use the friction knob handle to adjust the mounting arm position.
- Once you’re happy with the desired height and angle, insert the tablet into the cradle.
- Now your mount is ready to use.
Additional Resource Links
- QuickTalker Freestyle Mounting Support Hub
- QuickTalker Freestyle Accessories Support Hub
- One Mounting Arm Support Hub
Tips and Troubleshooting
If you have any additional questions, please contact the ableCARE Product Success Team for further assistance.
Was this article helpful?
0 of 0 found this helpful