Getting Started With All-Turn-It Spinner


Introduction
When getting Started, the video below offers an introduction and overview of how to use the All-Turn-It Spinner. Here are the topics covered and their video timestamps:
0:20 Batteries
0:53 Adding an overlay
1:28 Spinning the arrow and small overlay
Advanced Features
The video demonstrates how to use wireless switch control with the All-Turn-It spinner. Please note that this requires the Wireless Receiver and a Jelly Beamer or a Big Beamer Transmitter switch, which are sold separately.
Additional Resource Links
- All-Turn-It Spinner Quick Start Guide
- All-Turn-It Spinner Instructions for Use
- All-Turn-It Spinner Overlay Directions
- AT Resource Hub for activities and curriculum featuring this device
Tips and Troubleshooting
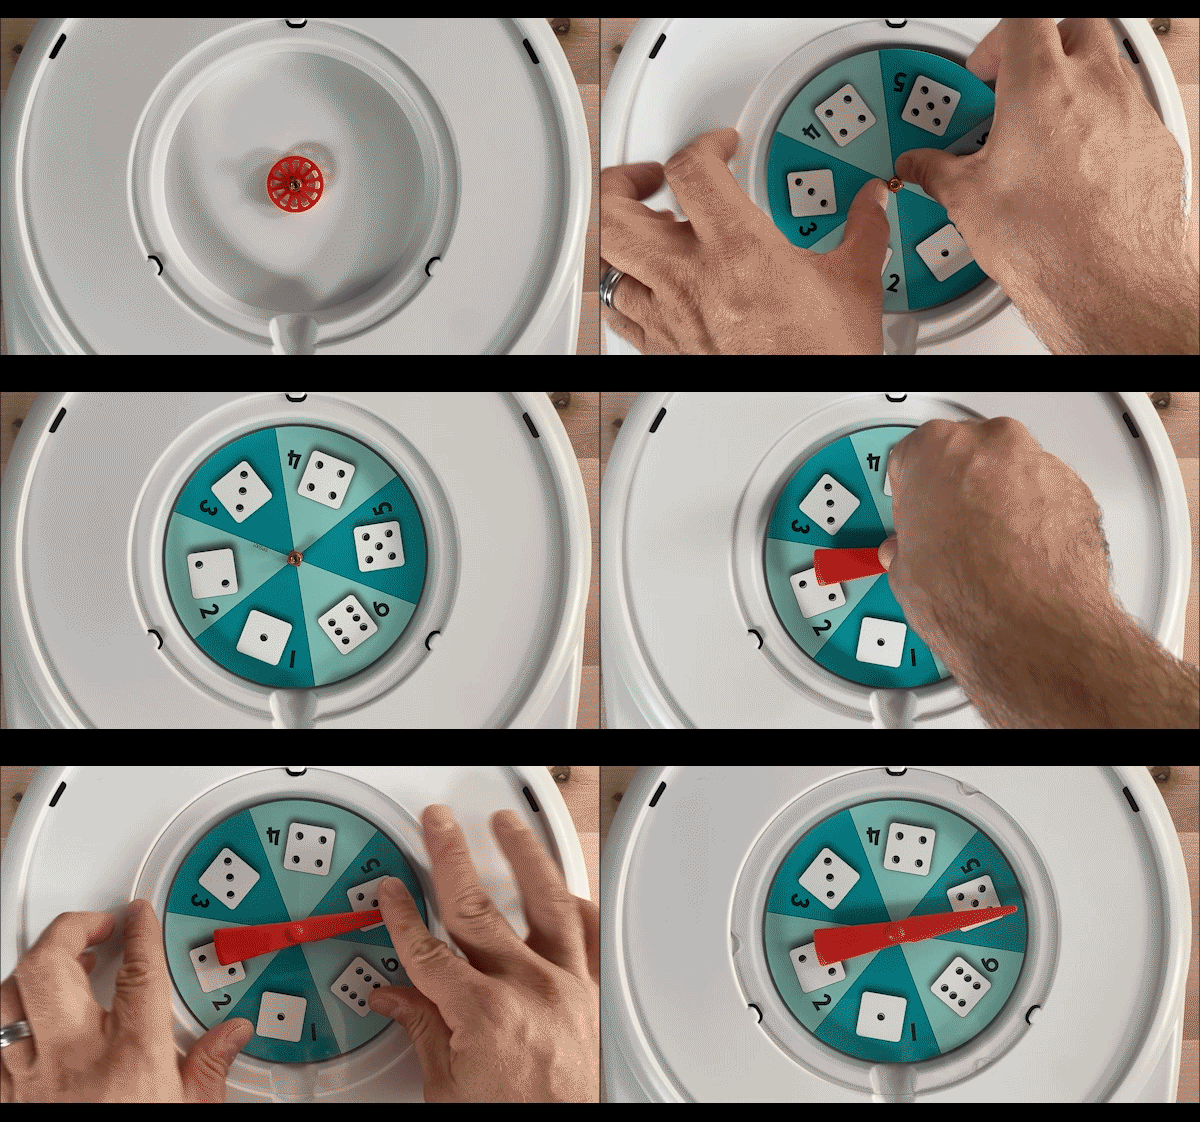
To install the center disk, spinner, and clear plastic cover, please review these steps or view the animated GIF to watch this process.
- Push down firmly with two fingers on the center disk, press close to the spindle to ensure that the disk is firmly in place.
- Next, put the spinner on the spindle and press down gently.
- Then, place the clear plastic over so that the tabs line up with the grooves.
- Finally, twist the plastic clockwise a quarter turn until it clicks into place.

Please visit the All-Turn-It Spinner Support Hub for additional support resources. If you have any additional questions, please contact the ableCARE Product Success Team for further assistance.
Don’t Forget to Register Your Product
Registering your product provides you access to ableCARE, product updates, and resources for your product. Click here to visit our product registration page to get started.
Was this article helpful?
0 of 1 found this helpful

